
IN THIS SECTION
- Overview
- Managing Eliminations
- Eliminations effects and adjustments
- Identifying and Creating Eliminations using Joiin Intelligence
- Downloading Accounts with Elimination Status
Overview
The Eliminations tab on the Settings page allows you to exclude, or eliminate accounts, contacts or transactions from reports. In any inter-company consolidation it can be important to exclude certain transactions such as inter-company loans to ensure the totals accurately represent a true picture of the consolidated entity. You can do this in Joiin using Eliminations.
Types of Elimination
Exclusion
You can Exclude an Account entirely from your Chart of Accounts which means it will not appear in any financial reports (Profit & Loss, Balance Sheet, Cashflow, Trial Balance, KPIs and Combined). An Exclusion only applies to Financial reports.
Eliminate by Account
You can create Elimination Groups where accounts between two (or more) Entities can be eliminated and, if required, netting adjustments created. Marking accounts as eliminated will mean that the accounts and their balances will be removed from all Financial reports.
Eliminate by Contact (AR/AP, Sales & Purchasing Reports)
You can create Elimination Groups where contacts (customers and suppliers) between two (or more) Entities can be eliminated. Any transactions for the eliminated Contacts will be removed from the Joiin Sales & Purchasing reports. Marking contacts (customers or suppliers) as eliminated will mean that any transactions related to those contacts will be removed from all Sales & Purchases reports.
NOTE: Currently, Elimination by Contact do not affect Financial Reports - i.e. financial report account balances will not be adjusted to remove any transactions related to eliminated contacts. Use Eliminate by Account + Contact for this purpose.
Eliminate by Account + Contact
You can create Elimination Groups where individual transactions between two (or more) Entities can be eliminated from financial reports and, if required, netting adjustments created. . Transactions are identified by specifying a combination of accounts and contacts (customers and suppliers). Any transactions for the eliminated Accounts and Contacts will be removed from the Joiin financial reports. Lines on those accounts with no contact, or with another contact, stay in the reports.
Elimination by Account + Contact works by summing the individual journal entries for a specific account and contact pair, then removing that amount from the consolidated report.
Balance Sheet accounts accumulate from all time — every transaction ever posted to that account/contact is included in the elimination. This is because BS balances are cumulative; the balance at any point is the sum of all historical transactions.
Profit & Loss accounts only eliminate transactions from the period(s) the report is being run for.
NOTE: You can see the individual Journals that make up a balance by using the Journal drill-down feature. You can run a report for a period that spans the timeframe of the journals and then drill-down on the balance to see all the Journals. Downloading those results and filtering by contact will allow you to verify the journals used in the Elimination.

One caveat to this is that some company data is only fetched back to a certain date, so reports run dates are restricted based on this. You can change this config in the Company configuration page.
NOTE: Eliminations by Contact and Eliminate by Account + Contact only work for Xero and QuickBooks companies as currently, no transaction data is available for other company types (Pennylane, Puzzle etc.)
NOTE: Eliminate by Account + Contact shows on the Eliminations page once Joiin has read the contacts on the journal lines of all your Xero and QuickBooks companies. If you do not see it when you create an Elimination Group, it is not available for your account yet: use Eliminate by Account, which eliminates the whole account, including lines with outside customers and suppliers, or contact support.
Elimination Sets
You can also group your exclusions and elimination groups into Elimination Sets so that you can quickly control which sets are applied to which reports.
Managing Eliminations
You can exclude and eliminate accounts or contacts through the Eliminations page.
NOTE: You can change the way Eliminations are treated when you run a report by changing the eliminations setting on the report page - you can choose Remove Eliminated, Show Eliminated Only, Show All or Show Eliminations in Columns - see Running Reports article for more information.
The Eliminations Page
The Eliminations page shows you all the Eliminations that have been set up in each Elimination Set. See below for more information on Elimination Sets.
The Eliminations page shows whether each Elimination Group and Exclusion leaves your consolidated Balance Sheet out of balance, and by how much.
The page has two tabs: Financials, for the groups and Exclusions that change the financial reports, and Sales & Purchasing, for groups that eliminate by contact.
On the Financials tab, choose the Month and Currency at the top. The eliminations shown below show each company's amounts for the selected month, indicating whether they balance or not. Balance Sheet accounts are taken at the month end, and Profit & Loss accounts are year to date.
Each group and Exclusion shows below as one row, with its status on the right. Under it is one line per company and account, with the amount. Debits are positive and credits are negative.
Elimination Group status:
- Balanced - the companies' amounts add up to zero.
- Out by X - the amounts do not add up to zero. If the group's Netting Adjustment is on (grey), the difference is added as a Joiin Intercompany Adjustment line, so the Balance Sheet still balances. If it is off (red), the Balance Sheet is out by X. Check the entries, or edit the group and tick Add Netting Adjustment.
- 1 company has no amount - one company has nothing on its accounts in the group while another does. Usually the wrong account is listed, or that company has not recorded its entry yet.
- Nothing to eliminate - every account in the group is zero in that month.
Exclusion status:
- Cancels out - the companies' amounts add up to zero.
- Out by X - the Balance Sheet is out by X, as an Exclusion has no Netting Adjustment. Often the account is excluded for only one side of an intercompany balance - use an Elimination Group instead.
- Nothing to exclude - no company has an amount on the account.
Things to check: an orange badge after a name flags a possible problem, such as One company, Deleted company, In 2 groups, Account Removed or Contact Removed. Hover over it to see the reason. The banner above the table counts them - click show to list only those.
Use the search box to find groups by account, contact, group or company.
The figures use the same calculation as the Balance Sheet report.
Elimination Sets
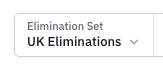
You can create Elimination Sets which are groups of eliminated accounts which can be applied when running reports. By default there is a single Default Elimination Set. To add another or change the name of the set click on the dropdown at the top of the list.
- Click on the Add Elimination Set button to add a new elimination set.
- Click on the pencil icon to edit the name of the elimination set.
- Click on the delete icon to delete the elimination set. WARNING - if you delete an elimination set all the account eliminations associated with it will be removed.
- Click on the Clone icon to make a copy of the elimination set.
- To switch between elimination sets select the desired set from the dropdown.
How to create Elimination Groups
Elimination groups allow you to select entities and specific accounts or contacts within those entities that are part of an inter-company transaction such as an inter-company loan. The selected accounts or contacts will be eliminated from your consolidated report and, if required, a Netting Adjustment will be added.
To add or remove Elimination Groups select the Eliminations page from the Settings menu at the top right. A list of elimination groups and exclusions for the selected Elimination Set will be displayed. Exclusions will be marked with an E icon (P for a Partial Exclusion, which excludes the account for some companies only), Elimination Groups will be marked with an A (Eliminate by Account), T (Eliminate by Account + Contact) or C (Eliminate by Contact) icon, depending on the selected type.

Click on the Add Elimination Group button to create an Elimination Group.

- Enter the name for the Elimination Group.
- Select the method of elimination: Eliminate by Account, Eliminate by Contact or Eliminate by Account + Contact.
- Select the first company for one side of the Elimination. A list of accounts from that company's Chart of Accounts (and/or Contacts from the company's contact list) will be available for selection in the dropdown to the right.
- Select the account(s)/contacts(s) that are to be eliminated for that entity - you can search for accounts/contacts by code or name.
- Repeat for the second company.
- The transactions on either side of the inter-company elimination should net off - e.g. one side might contain a Liability account and the other side an Asset account - so combined, they net off.
- If required add additional companies by clicking on the Add Company button - and repeat the account/contact selection process.
- You can remove companies using the Delete icon next to the company.
- Choose whether a Netting Adjustment is to be added (see below).
- Click Create Elimination Group button to create the elimination group.
The group will appear in the list of eliminations and the selected accounts will be eliminated from reports if that option is selected when Running Reports.
Editing Elimination Groups
You can change an Elimination Group by selecting Edit from the three-dot menu to the right.
Removing Elimination Groups
To remove an elimination group from the elimination set, simply click on the three-dot menu to the right and select Remove elimination group.
Netting Adjustments
If Eliminating by Account or by Account + Contact, you can choose to enable the Add Netting Adjustment option for an elimination group. It is ticked for new groups, and we recommend you keep it on. When you do this, Joiin will automatically add one line for the group, Joiin Intercompany Adjustment, to the equity section of the Balance Sheet. Its value is the opposite of what the group's amounts add up to, so the group nets to zero and your consolidated Balance Sheet stays balanced. There are some exceptions when companies use different currencies; see Known Limitations in the Managing FX article. Balance Sheet accounts are taken at the month end and Profit & Loss accounts year to date; the Profit & Loss itself is never changed.
When the amounts on either side of the group cancel each other out, the line is 0. A line that is not 0 is not an error in itself, but it shows that the amounts do not cancel out. This can be because an intercompany account is missing from the group, or because the group's accounts also hold transactions with outside customers or suppliers (Eliminate by Account + Contact eliminates only the lines with the contacts you choose); in both cases the group needs changing. It can also be because the companies booked different amounts, or in different months, which needs fixing in their books. Reports that include only some of the group's companies, and exchange rates that moved between companies in different currencies, also change the line.
With Show Eliminations in Columns, the line is in the After column, not in the Eliminations column. If you turn the Netting Adjustment off, your consolidated Balance Sheet can stop balancing. Elimination Groups that eliminate by Contact do not change the financial reports, so they have no Netting Adjustment.
How to Exclude Accounts
Exclusions are used when you wish to eliminate a single account from all entities on the financial reports. For inter-company eliminations and more accurate reporting it is recommended to use an Elimination Group rather than an Exclusion.
To add or remove Exclusions select the Eliminations page from the Settings menu at the top right. A list of elimination groups and exclusions for the selected Elimination Set will be displayed. Exclusions will be marked with an E icon (P for a Partial Exclusion, which excludes the account for some companies only), Elimination Groups will be marked with an A, T or C icon.

Click on the Add Exclusion button to exclude an account(s).
Select the account(s) you wish to exclude from the list. You can search for accounts by name or code to filter the list.
Once you have selected the accounts you wish to exclude, click on the Exclude button to exclude them
The account(s) will appear in the list of eliminations and will be excluded from reports if that option is selected when Running Reports.
Removing Exclusions
To remove an exclusion from the elimination set, simply click on the three-dot menu to the right and select Remove exclusion.
Eliminations effects and adjustments
Adding Eliminations can affect your reports in many ways. Improper set up can cause reports to not balance properly. Any issues with balancing will be flagged by the Balancing Indicator. Also Joiin may add various adjustments automatically to your reports to account for any variances in FX etc. caused by the presence of eliminations. For more information see the Managing FX and Cashflow Report articles.
Identifying and Creating Eliminations using Joiin Intelligence
You can use the Joiin Intelligence AI features to help you find and create the Eliminations that you need. Go to the Joiin AI item on the left menu and start a Chat then enter a prompt such as
> help me create eliminations
The Joiin Intelligence Eliminations Creation Agent will then start work to guide you through the process of finding and creating eliminations.
Downloading Accounts with Elimination Status
You can download a list of accounts with a column showing their eliminated status through the Chart of Accounts page.