
This guide walks you through connecting Joiin to Claude using an MCP server, so you can query your financial data and manage tickets directly from Claude.
If you are on a Claude Team or Enterprise plan, you will need your admin to complete the connector setup and authorisation before you can connect individually.
NOTE: Claude Free plan users can add one custom connector; Pro, Max, Team, and Enterprise plans support multiple.NOTE: Joiin does not appear in the Claude connectors directory - it must be added manually as a custom connector
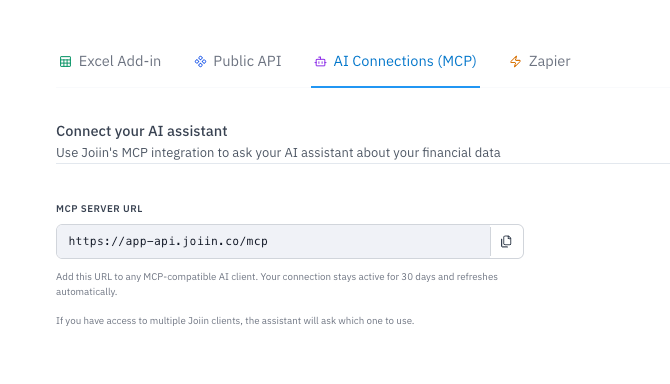
Before setting up in Claude, you must get the Joiin MCP Server URL from Joiin. To do this:
- Log into Joiin
- Select Integrations from the left menu.
- Select the AI Connections (MCP) tab.
- The MCP Server URL is shown - see below - you can click on the Copy icon to copy it to your clipboard for use in the steps below.
Now follow the path that applies to your plan.
Personal plan (Free, Pro, or Max) — user-level setup
- Sign in to Claude on the web, desktop, or mobile app.
- Open Settings (or Customise, depending on your client) and go to Connectors.
- Click Add --> custom connector.
- Enter a name for the connector (e.g. "Joiin") and paste in the MCP server URL you copied from Joiin in the step above.
- Click Add.
- Click Connect next to the new connector — you'll be redirected to sign in and authorise with your Joiin account.
Team or Enterprise plan — admin-assisted setup
- Have your workspace Owner or Primary Owner sign in to Claude.
- The admin goes to Organisation settings > Connectors.
- The admin clicks Add --> custom connector, enters a name, and the Joiin MCP server URL you copied from Joiin in the step above.
- The admin clicks Add to save the connector for the organisation.
- Once added, individual team members will see the Joiin connector available in their own Connectors settings. Each member clicks Connect and authorises with their own Joiin account — authorisation is per-user, so Claude only ever accesses the Joiin data that member has permission to view.
- Team members can confirm the connector is active via the + button in the chat composer, under Connectors.