
A dynamic date is a setting you can apply to a report that keeps the report output relative to the current date.
As time passes, the report date updates automatically based on the rule you have set. For example, if you choose "Last month", your report will always run data for the previous completed month, so there is no need to update it manually.
NOTE: In the latest version of Joiin, which is currently being rolled out, a Saved Report opens on the report page: change the report filters there and click Save. See Saving and Customising Reports.
To apply dynamic dates when creating a new report
1. Run your financial report and click the Report period filter. To apply dynamic dates, choose one of the preset Common formats, such as This month, Last month or Last 12 months by month.
These formats move with the current date rather than being fixed to set months.
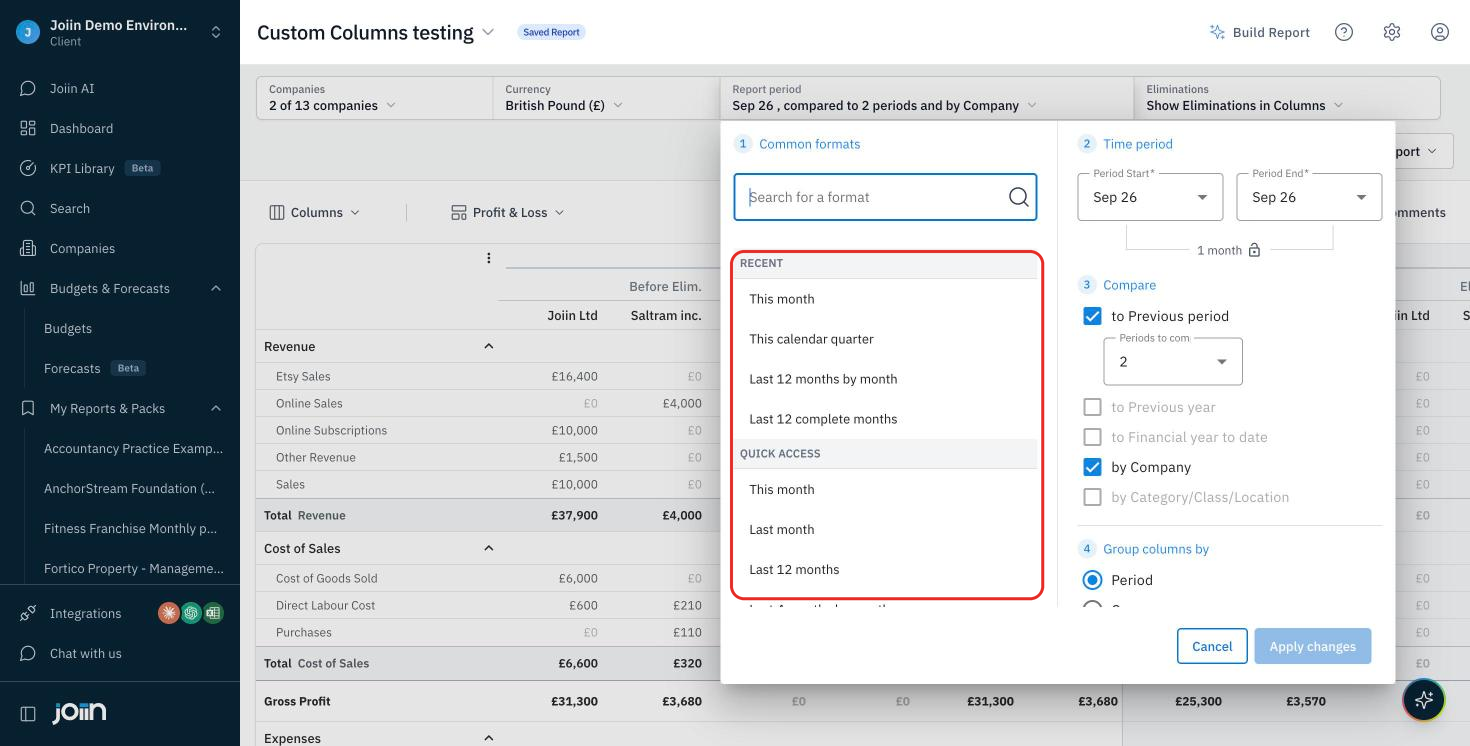
2. Click Apply changes to run the report.
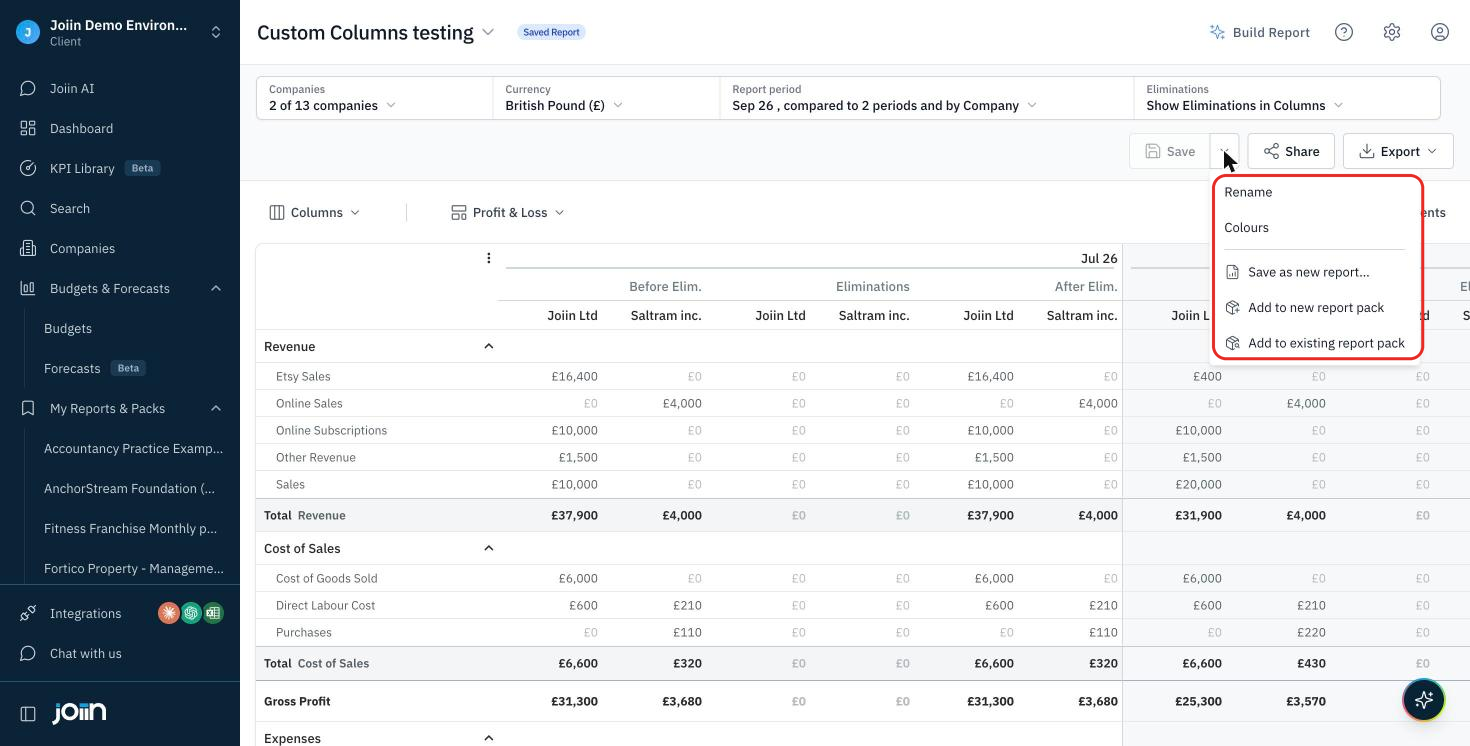
3. Save the report. Click Save at the top right, or use the arrow next to it, and choose how you want to save it. Save as report keeps it as a single Saved Report, or you can add it to a new or existing report pack.
4. Ensure you choose the dynamic dates option.
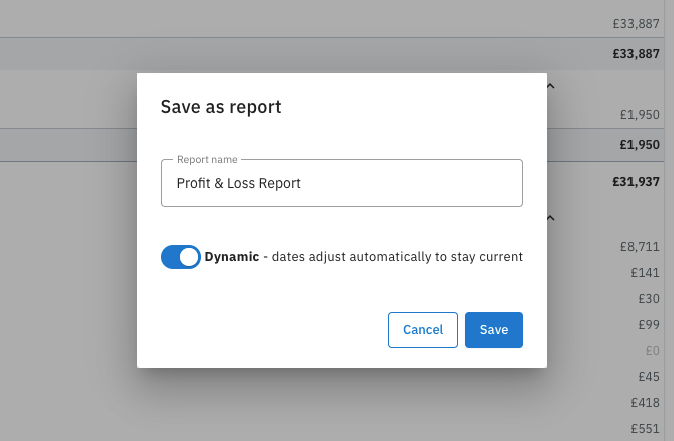
Your dynamic dates are saved with the report, so it stays up to date with the current month each time you open it.
To change the dynamic dates on a Saved Report
1. Navigate to the My Reports & Packs section. You can choose All, Saved Reports or Report Packs to filter the list.
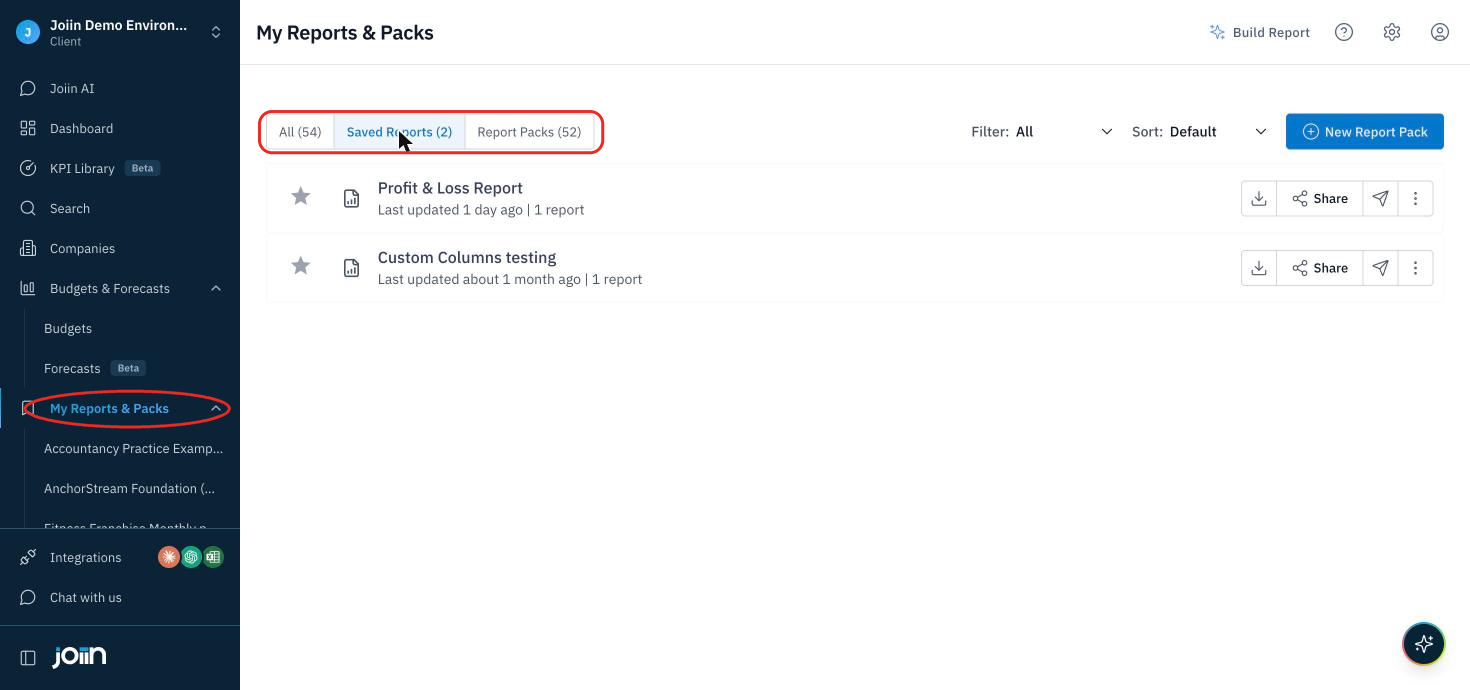
2. Select the Saved Report you wish to edit. It opens on the report page, with a Saved Report label next to its name.
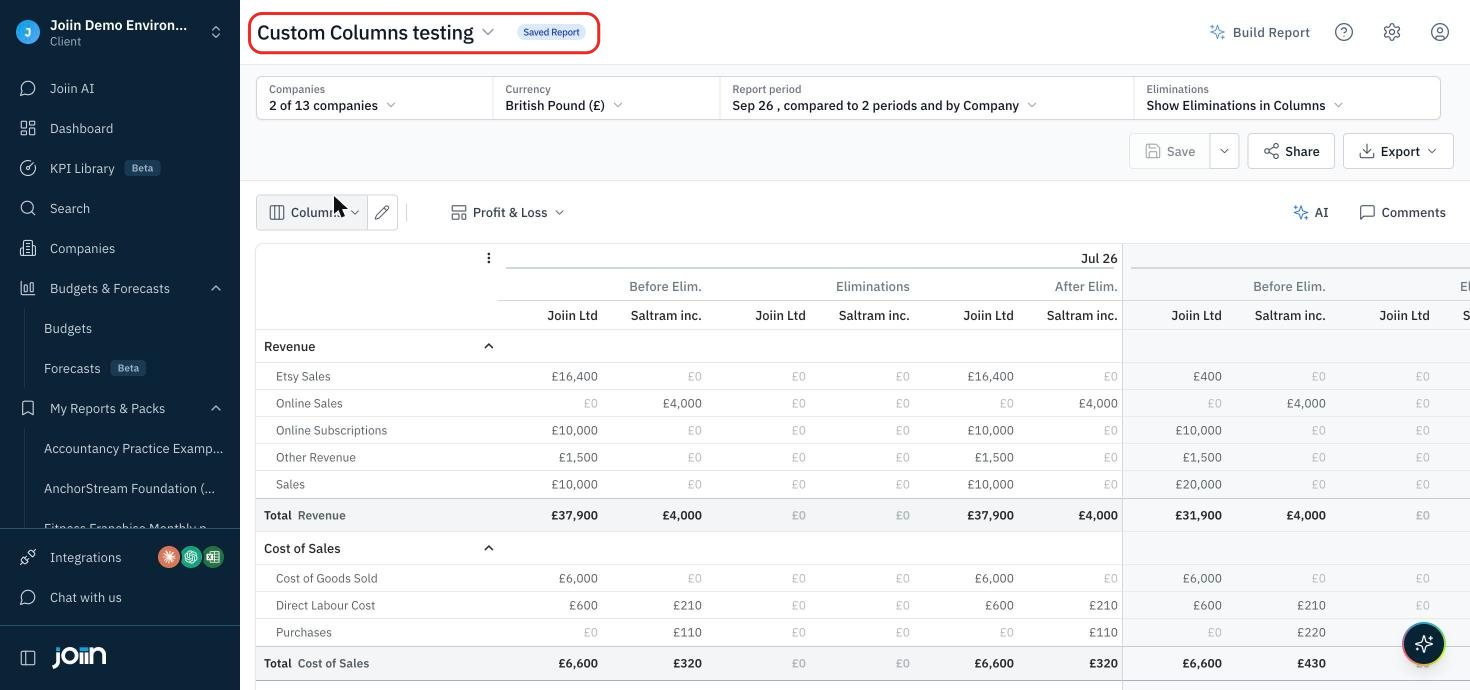
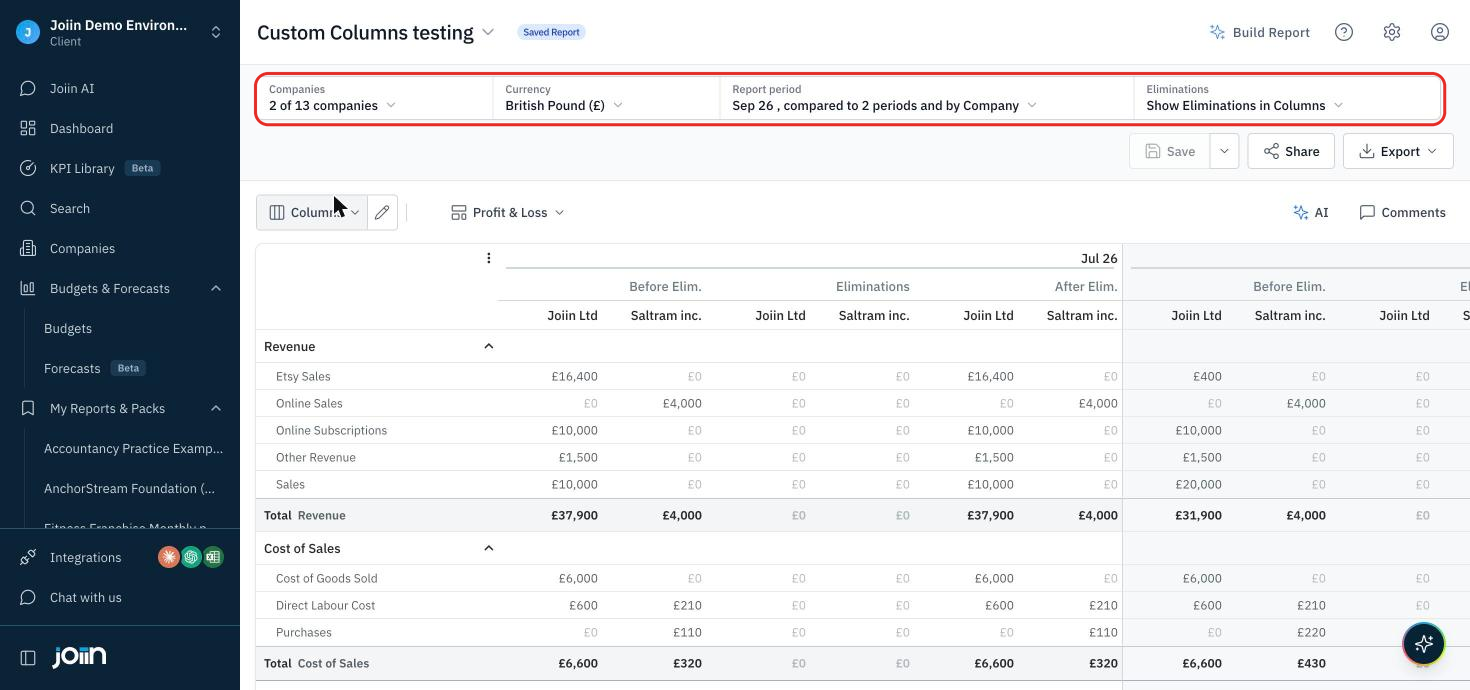
3. Click the Report period filter at the top of the report, choose the preset format you need, then click Apply changes.
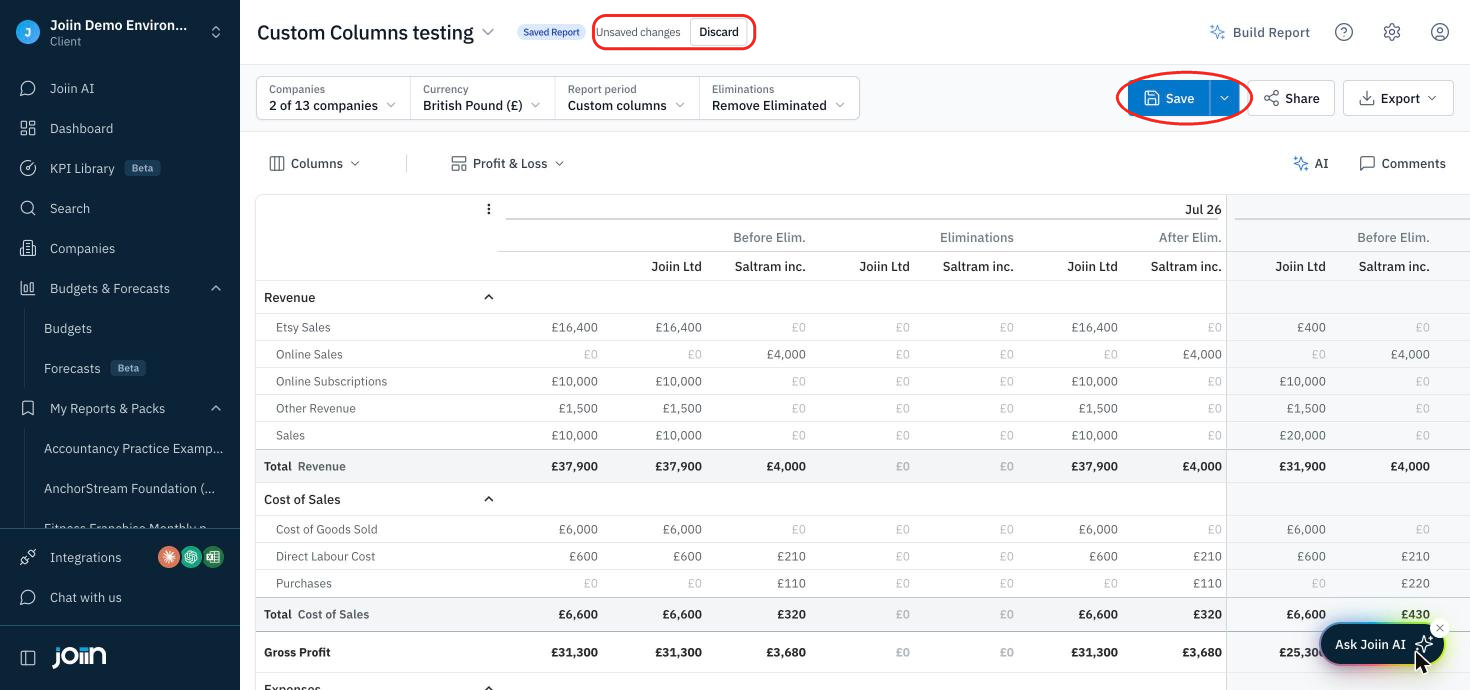
4. Unsaved changes appears next to the report name and the Save button turns blue. Click Save to keep the dynamic dates, or Discard to go back to the Saved Report as it was last saved.
To change the dynamic dates on a report inside a Report Pack
1. Open the report pack from My Reports & Packs and scroll to the report you want to change.
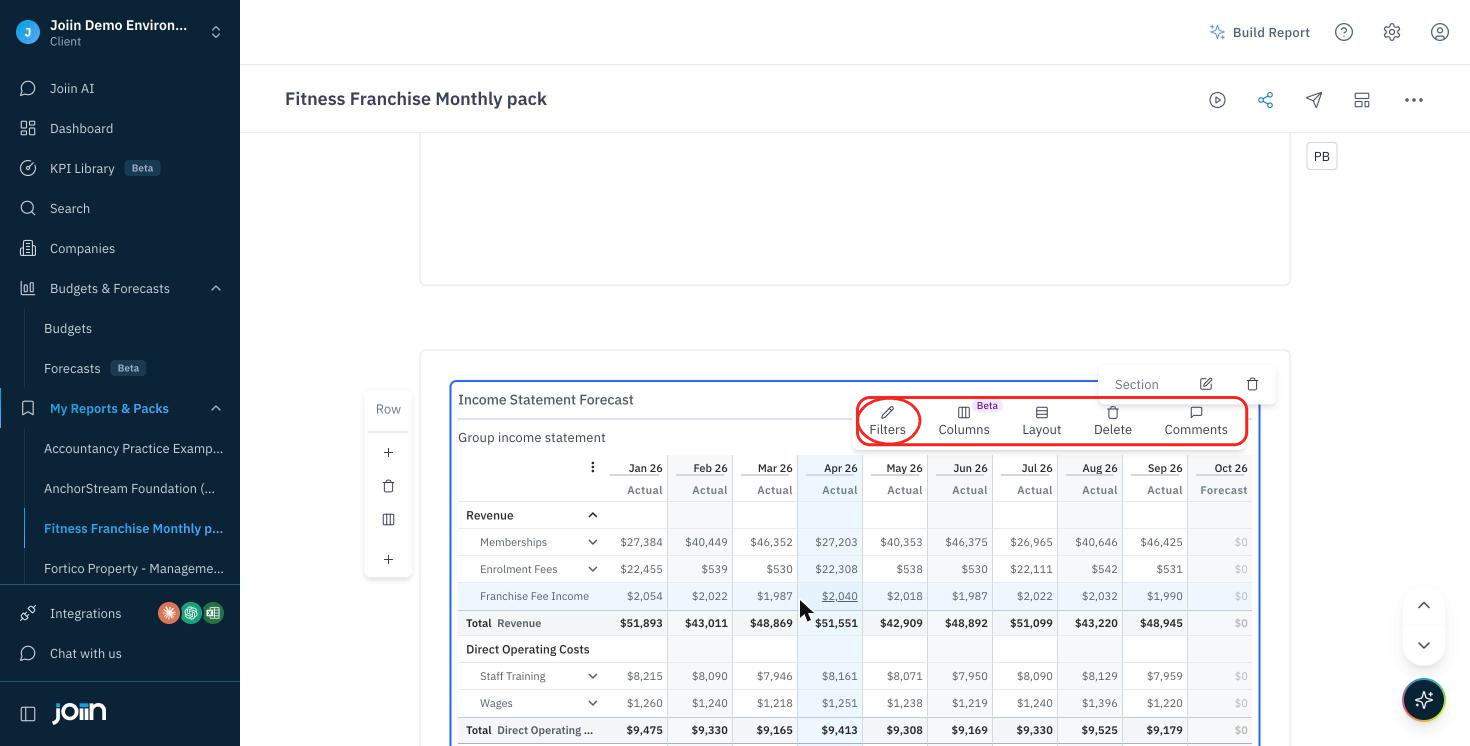
2. Hover over the report to bring up its toolbar, then click Filters.
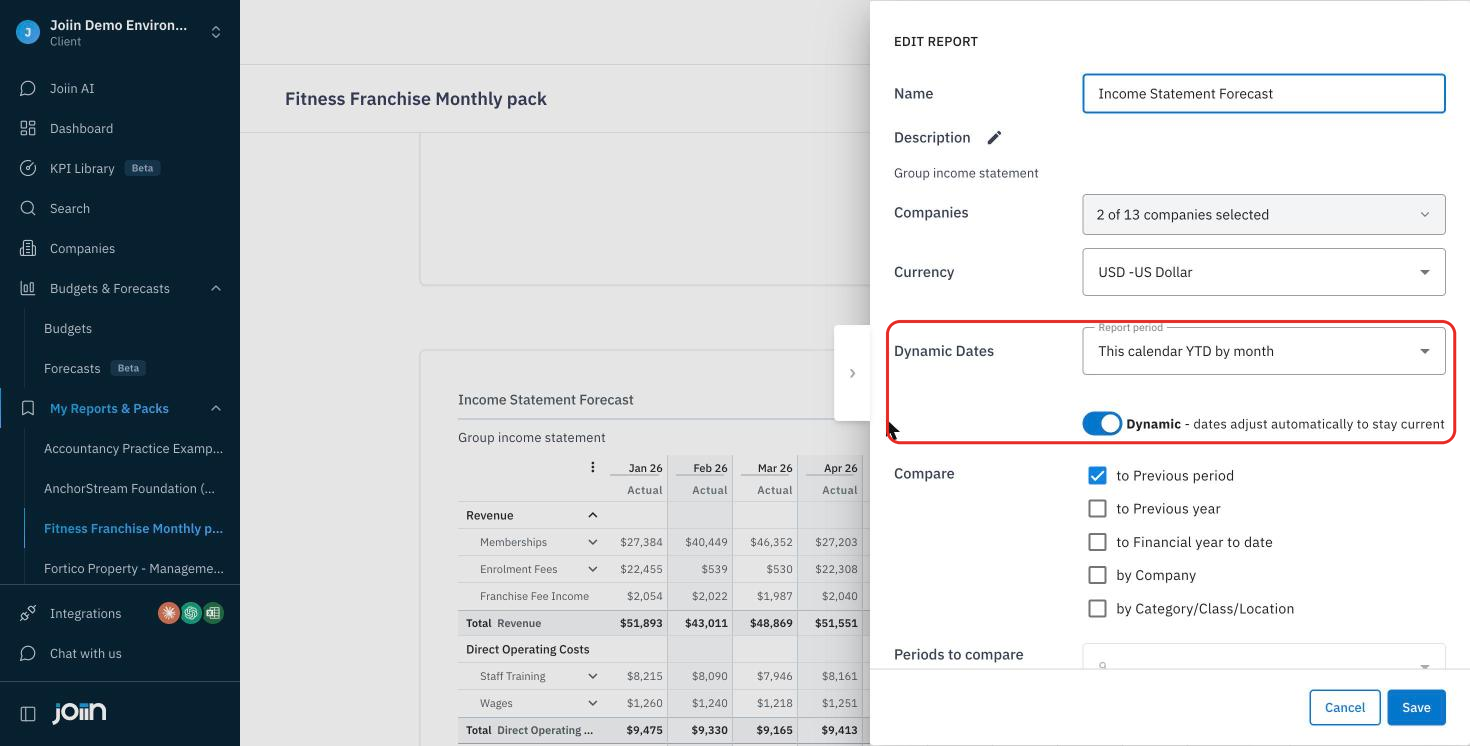
3. The Edit Report panel opens. Use the Dynamic toggle to turn dynamic dates on or off for that report. With the toggle on, the field above is labelled Dynamic Dates and you choose a preset report period that adjusts automatically to stay current.
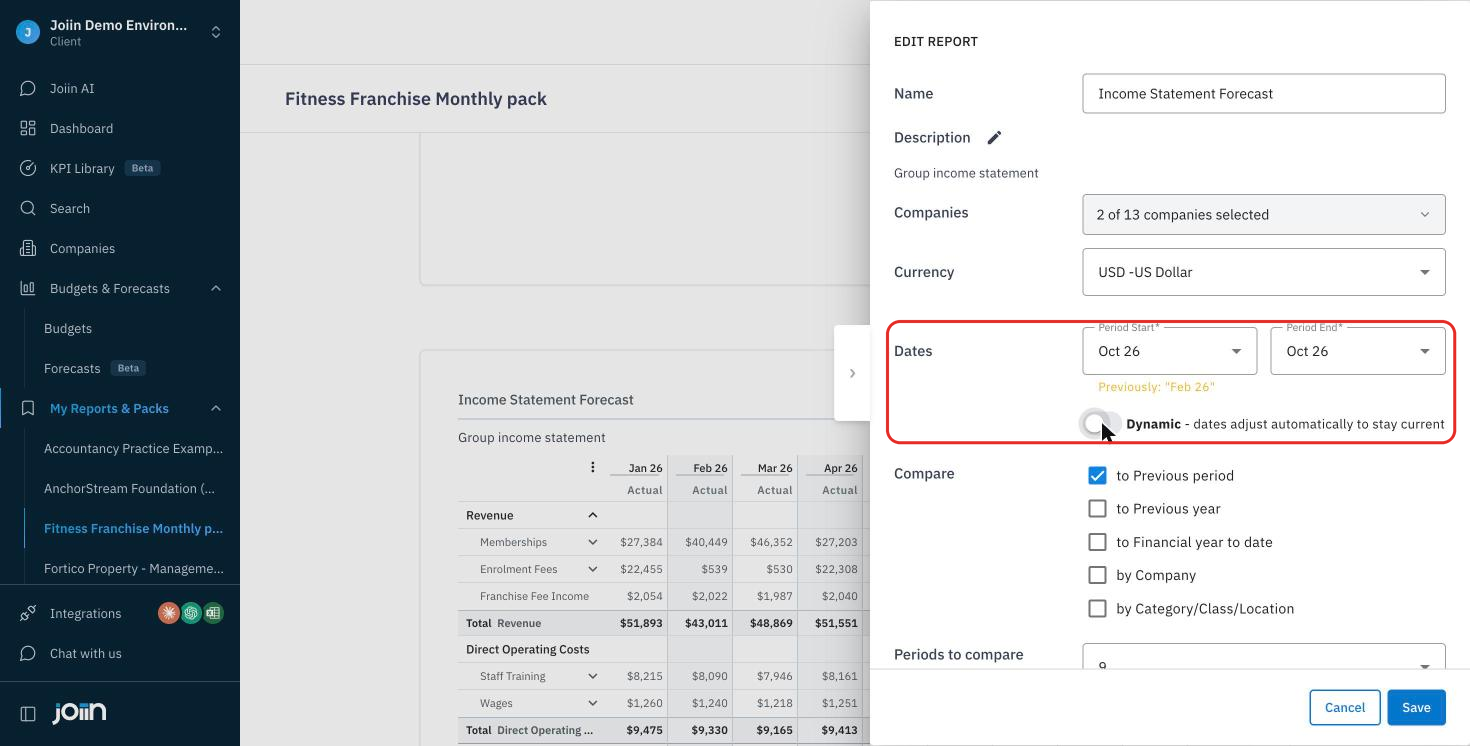
4. Turn the toggle off and the field becomes Dates, where you set your own Period Start and Period End months. These stay fixed and will not move with the current date.
5. Click Save and the report will run again with the dates you have chosen.
For more on working with the content in a pack see Building Report Packs.
Dynamic dates on reports that use Custom Columns
With Custom Columns, each column has its own dates, so the report no longer has a single report period and dynamic dates are set per column instead. On these reports, the Report period button shows Custom columns.
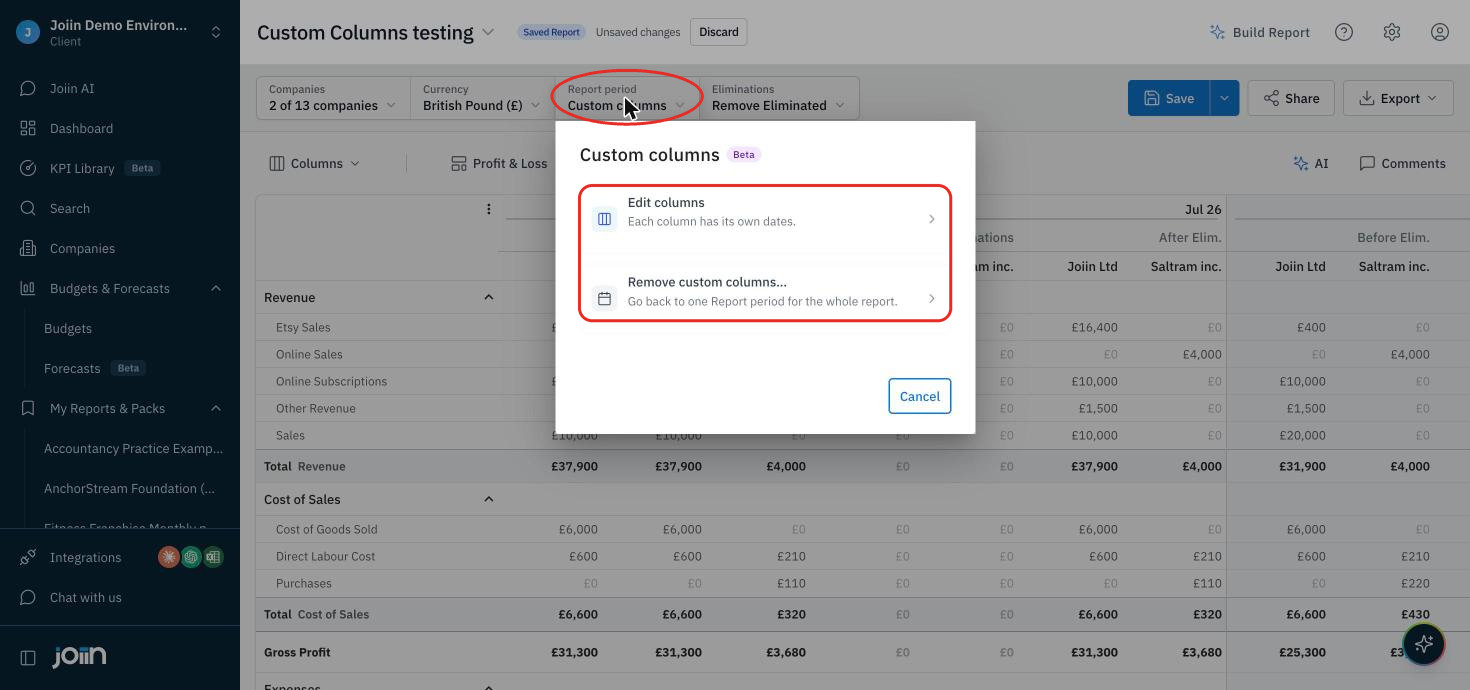
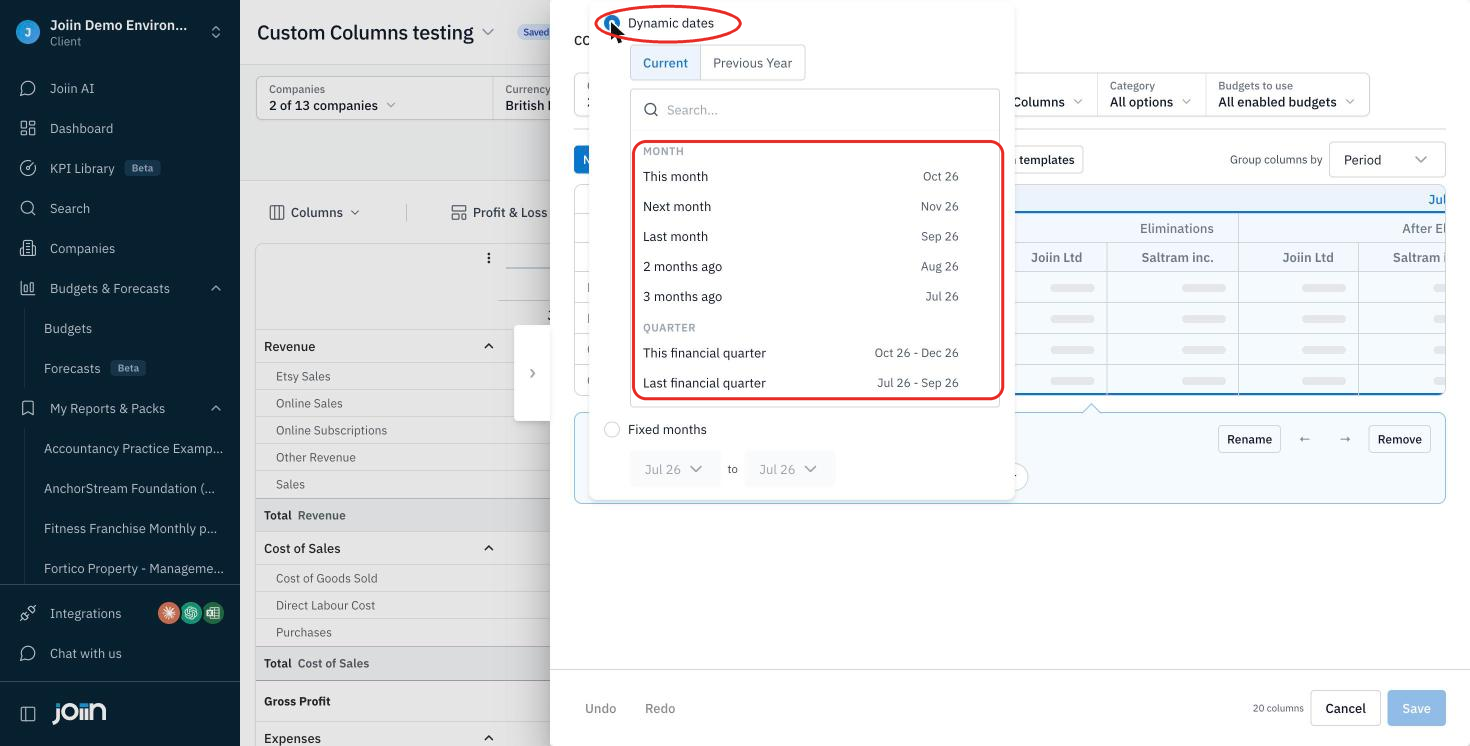
Click Edit columns to open the Columns editor, select a column, then click Period and choose Dynamic dates. You can pick options such as This month, Last month, 2 months ago, This financial quarter or Last financial quarter, and the Previous Year tab gives you the same periods a year back. Fixed months sets a start and end month that do not change.
Click Save in the Columns editor to apply your columns, then Save on the report to keep them. For more on building columns see Custom Columns (Beta).